

Get the transcript first, then use AI to generate the summary. That single sequencing choice is the difference between a summary you can trust and one that quietly invents details. The output you want is a short TL;DR, a set of timestamped bullets, and a few pulled quotes or action items. If the video has no captions, add one step: transcribe the audio before you summarize anything.
TL;DR:
- Relying on captions alone works only when captions are accurate and available; auto-generated captions often need a cleanup pass for reliability.
- Breaking long videos into overlapping segments of 10 to 30 minutes along chapter markers ensures better context retention during summarization.
- Always verify key claims and proper nouns with timestamps and direct quotes to avoid trusting hallucinated details from AI summaries.
- Using a transcript-first approach, including manual cleaning and chunking, results in more accurate and traceable summaries for research or citation purposes.
- Automated tools like AtListen streamline the entire process into one step, extracting transcripts, generating summaries, and creating study materials in minutes.
Table of Contents
- Why Transcript-First Beats Pasting a URL Into a Chatbot
- The Step-by-Step Workflow for Turning a Video Into Notes
- What to Do When Captions Are Missing or the Video Runs Long
- Choosing the Right Summary Format and Prompt
- How to Catch a Hallucinated Summary Before You Trust It
- Matching the Workflow to Your Actual Goal
- Why the Fastest Tool Isn't Always the Right One
- Skip the Manual Steps With a Built-In Study Workflow
- Sources
Why Transcript-First Beats Pasting a URL Into a Chatbot
Feeding a raw video link straight into an AI tool works, until it doesn't. Some browser extensions and web tools read the caption track directly, which is fast for a captioned lecture or a well-produced explainer video. But that speed depends entirely on caption quality, and it breaks down when captions are missing or riddled with errors.
The most reliable method separates the two jobs: extract or generate a clean transcript first, then hand that text to an AI model for summarization. This preserves exact quotes, keeps names spelled correctly, and gives you a document you can trace every claim back to.
Transcript quality determines everything downstream. A messy, auto-generated caption file full of run-on sentences produces a messy summary. A cleaned transcript with punctuation and speaker breaks produces a summary you'd actually cite.
- Caption extraction: fastest option, works only when captions exist and are reasonably accurate
- Full speech-to-text transcription: slower, but necessary for videos with no captions or heavy background noise
- Hybrid cleanup: pull the caption file, then run a pass to fix obvious errors before summarizing
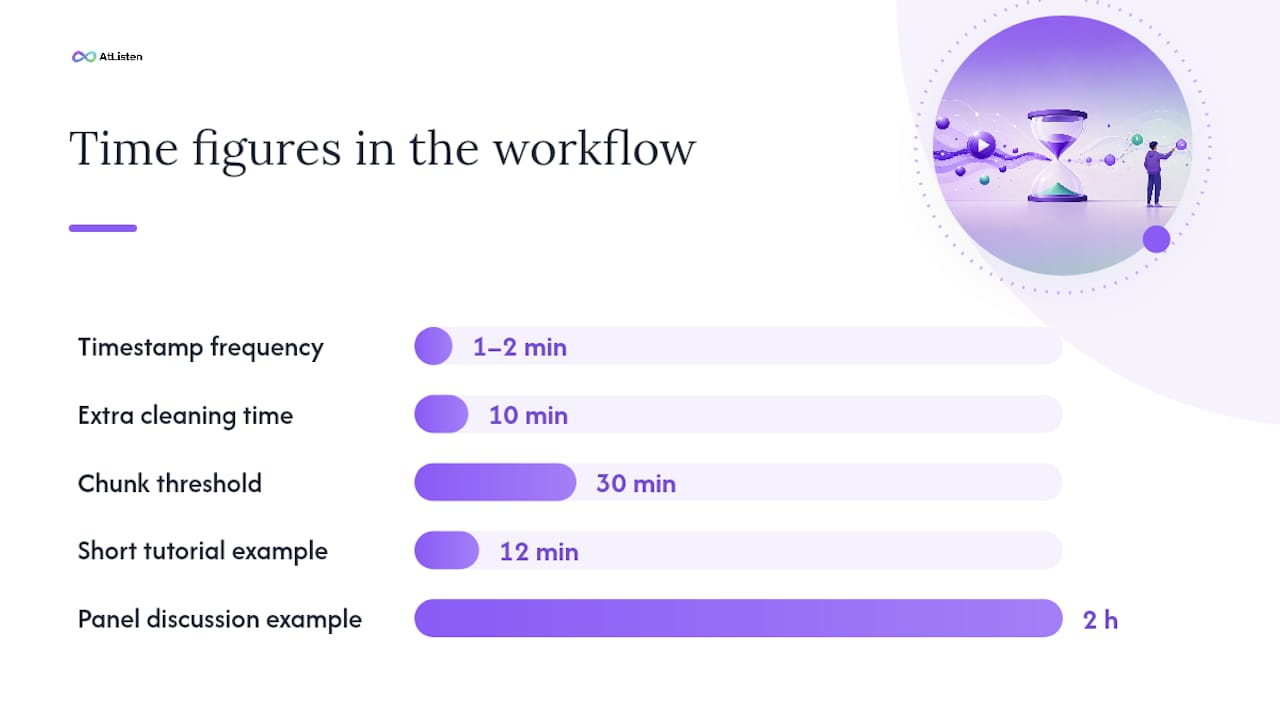
Pro Tip: If a video has auto-captions but they're full of odd word substitutions, don't skip straight to summarizing. Run a quick cleanup pass first. Ten minutes of editing saves you from a summary built on garbled transcript text.
The Step-by-Step Workflow for Turning a Video Into Notes
Follow this in order and you'll rarely need to redo the work.
- Check for a built-in transcript. Click the three-dot menu under the video and select "Show transcript." This is the fastest path when it's available.
- Transcribe manually if captions are missing or bad. Use a speech-to-text engine to generate your own transcript from the audio track.
- Clean the text. Strip filler words ("um," "you know"), but keep or add timestamps every minute or two, and preserve any chapter headings the creator included.
- Chunk long transcripts. If the video runs past 30 minutes, break the transcript into consistent segments before summarizing (more on the exact rules below).
- Summarize each chunk, then merge. Run your AI prompt on each piece separately, then combine the results into one coherent document.
- Save both files. Keep the raw transcript alongside the final summary so you can spot-check any claim later.
This is the same sequence most transcript-to-AI workflows recommend, and it works whether you're summarizing a 12-minute tutorial or a two-hour panel discussion. The extra ten minutes spent cleaning and chunking pays for itself the first time you need to double-check a fact.
Pro Tip: Never delete the transcript after you get your summary. It's your receipt. When someone asks "where did that number come from," you want an answer in seconds, not a rewatch.
What to Do When Captions Are Missing or the Video Runs Long
Two problems show up constantly: no captions, and videos too long to summarize in one pass.
When captions are absent or obviously wrong, don't settle for a caption-only tool. Run the audio through a higher-quality transcription engine instead. It costs a few extra minutes but avoids a summary built on nonsense text.
For long videos, chunking rules matter more than most people expect:
- Break the transcript into 10 to 30 minute windows, based on how dense the content is.
- Overlap each chunk by 30 to 60 seconds so you don't lose context at the boundary. This mirrors the chunk-and-merge strategy recommended for respecting model context limits on very long recordings.
- Label each chunk with its time range so the merge step stays organized.
- If the creator added chapter markers, chunk along those instead of fixed time windows. Chapters preserve the video's own logical structure better than an arbitrary clock split.
A quick caption-only TL;DR is fine when you just need the gist of a 10-minute video before a meeting. Invest in a full transcript when you'll cite the content later, whether in a paper, a report, or a study guide.
Choosing the Right Summary Format and Prompt
Not every video needs the same treatment. Match the output to the job:
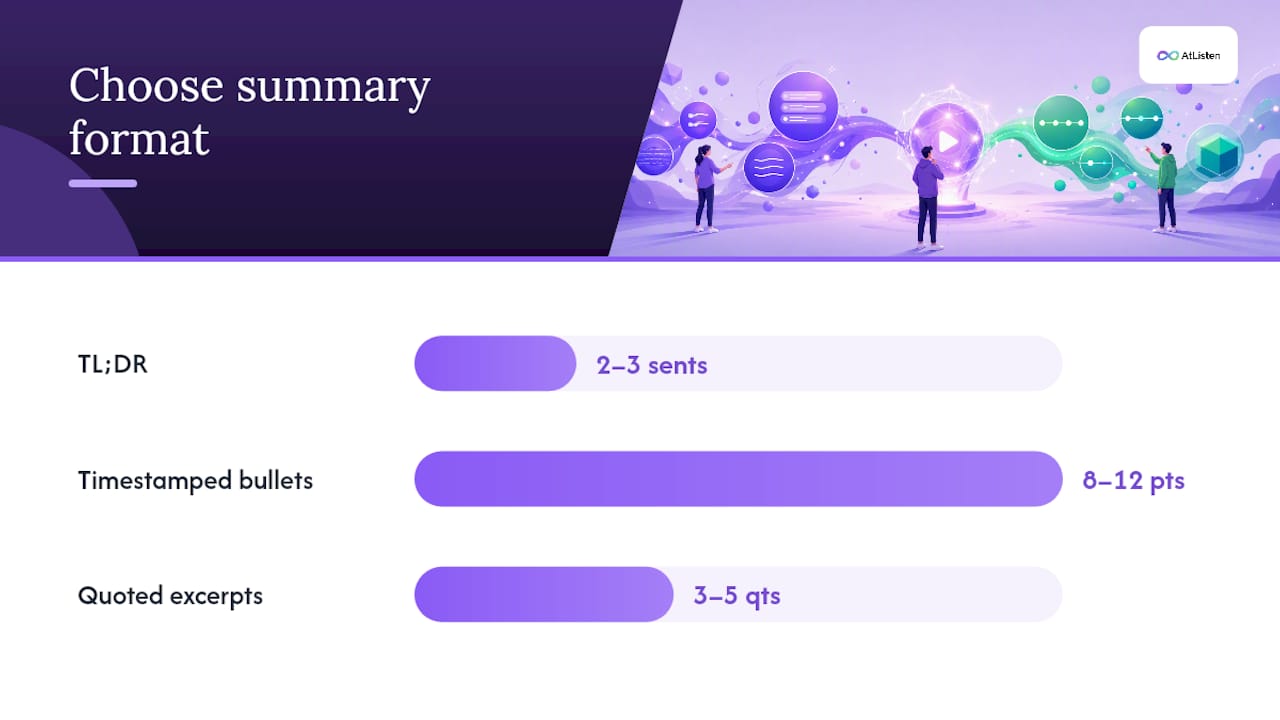
- TL;DR (2 to 3 sentences): for a quick gut check on whether a video is worth your time
- 8 to 12 timestamped bullets: the workhorse format for most study and research needs
- 3 to 5 quotes with timestamps: when you need to cite exact wording
- Action items or next steps: for meeting recordings and how-to content
- A short glossary: for technical or jargon-heavy videos
A three-part package combining a TL;DR, key bullets, and a chapter breakdown covers most use cases and lets you pick the depth you actually need instead of reading a wall of text.
Three prompts worth keeping on hand:
Structured prompts that request timestamps and flagged uncertainty consistently produce more verifiable output than an open-ended "summarize this" request.
How to Catch a Hallucinated Summary Before You Trust It
AI models occasionally invent details that sound plausible but never happened in the video. A short verification pass catches most of it.
Require a timestamp on every key bullet in the summary. If a bullet has no timestamp, treat it as unverified until you find where it came from in the transcript. Pull 3 to 5 direct quotes with timestamps and spot-check them against the source, and rewatch just those specific clips rather than the whole video.
- Check every proper noun, statistic, and strong claim against the transcript text.
- If something seems off or unsupported, mark it "needs verification" instead of publishing it as fact.
- Keep the transcript attached to the summary so anyone reading it later can trace a quote back to its source.
For videos packed with names or technical terms, a second transcription pass focused just on correcting proper nouns meaningfully reduces error rates before you summarize.
Matching the Workflow to Your Actual Goal
The right output depends on what you're using it for.
- Students get the most value from a 150 to 300 word summary paired with practice questions and flashcards built for spaced repetition, which is a natural fit for exam prep and clinical rotation study routines.
- Researchers need timestamped claims, direct quotes, and a short note on where each source clip came from.
- Content creators want a TL;DR plus a repurposing outline and a handful of social hooks pulled straight from the transcript.
- Professionals reviewing meeting recordings need action items, decisions, and named owners, each tied to a timestamp so nobody has to rewatch the call.
Why the Fastest Tool Isn't Always the Right One
Most people default to whatever summarizer loads first in a search result, and that's usually fine for a five-minute video with clean captions. The mistake is applying that same shortcut to a 90-minute lecture or a technical interview. Speed and accuracy trade off against each other more than people admit, and a summary that skips transcript verification will eventually hand you a confident, wrong answer.
The workflow in this guide isn't about doing more work. It's about doing the right work once. This transcript-first approach includes ingesting a lecture, video, or YouTube link, generating the transcript, and turning it into a summary, key concepts, practice questions, and flashcards in one pass, with the source material always available to check against. Learn more about how AtListen handles your data on its security page.
— William
Skip the Manual Steps With a Built-In Study Workflow
Everything above works. It also takes time: finding a transcript tool, cleaning the text, writing prompts, chunking long videos by hand. AtListen collapses that entire sequence into one upload.
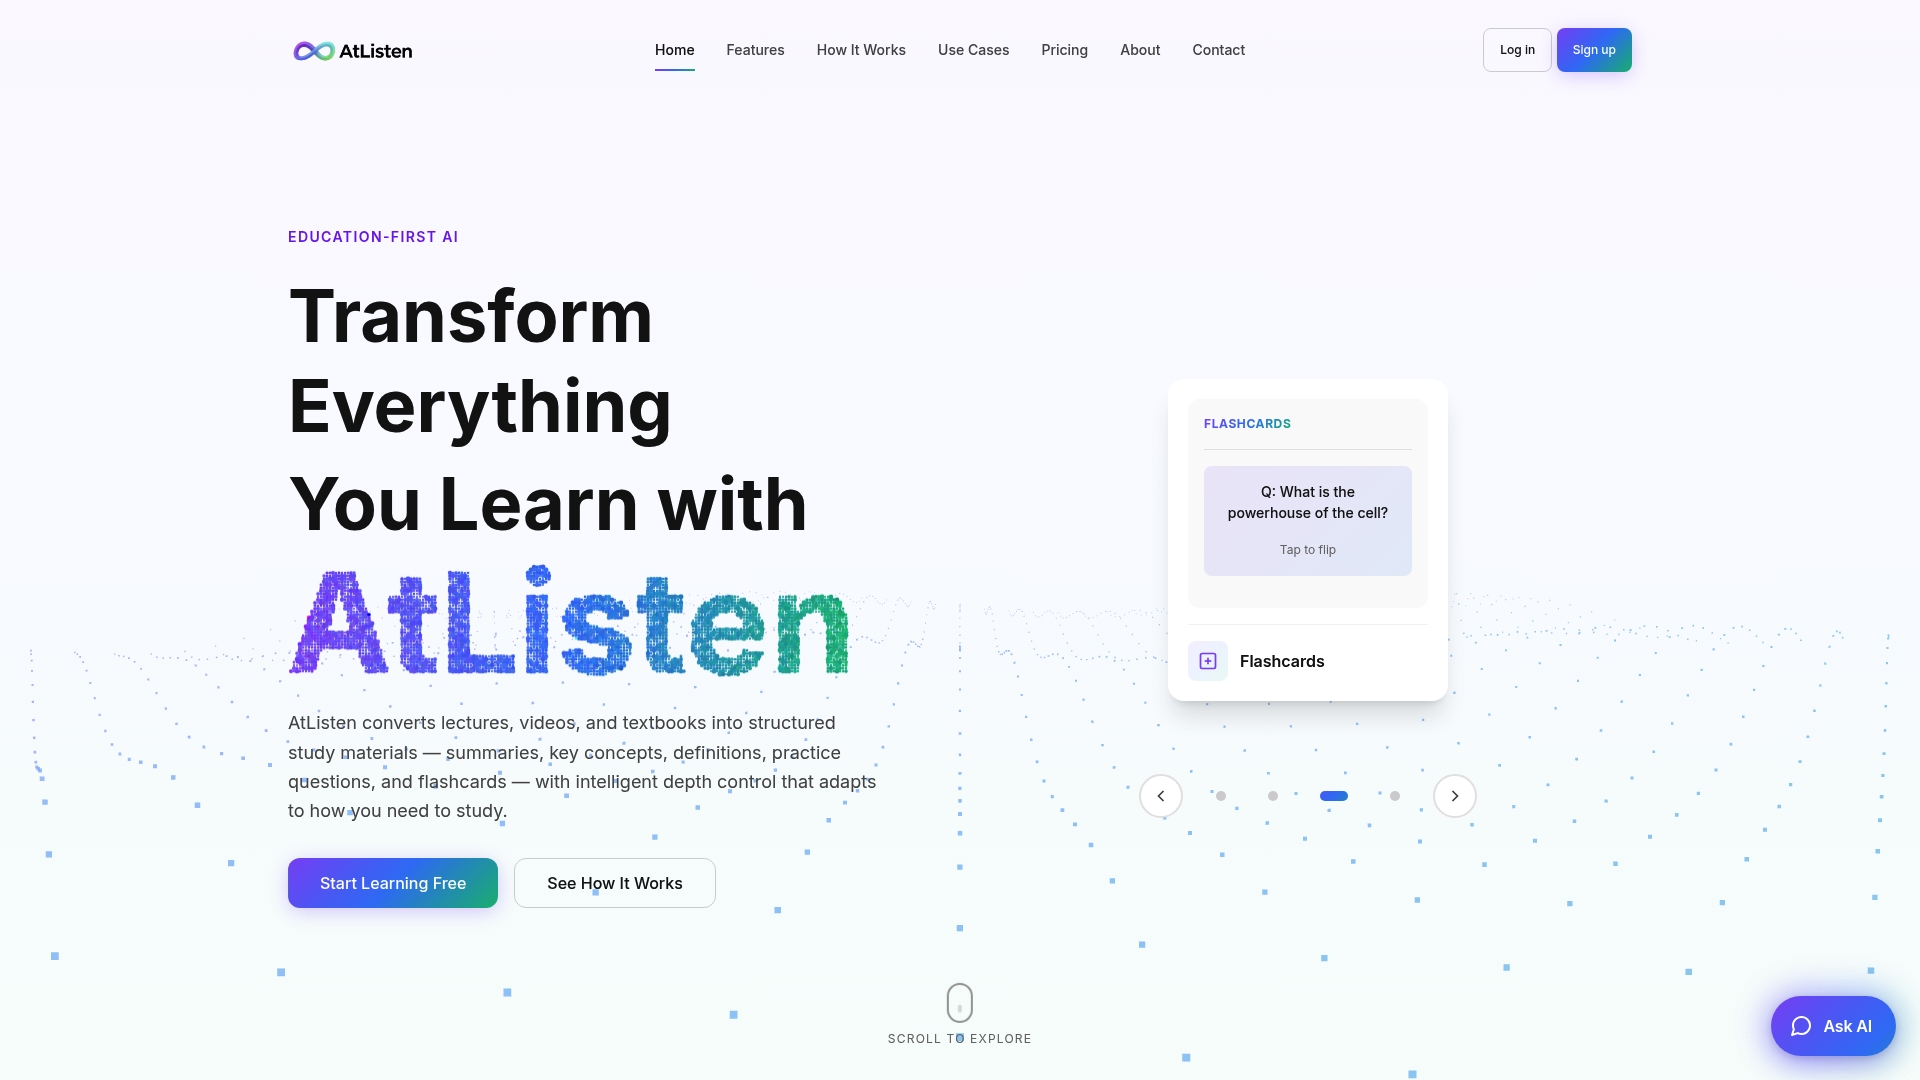
Paste a YouTube link or upload a lecture recording, and the tool extracts the transcript, then generates a TL;DR, key concepts with definitions, practice questions, and spaced-repetition flashcards in minutes. Every summary stays linked to its source material, so the spot-checking this guide recommends takes seconds instead of a full rewatch. That's the real advantage over stitching together a transcription tool, a chatbot, and a note-taking app yourself: one workflow instead of four, with consistent output every time.
The depth control adjusts to whether you need a quick refresher or a full study pack before an exam. Try the free tier at AtListen and turn your next lecture or video into a study pack before your next class starts.
Sources
- Is There a Way to Summarize YouTube Videos? Here’s the Fastest Workflow - Transkripe
- How to Summarize a YouTube Video: Transcript-to-AI Workflow With Timestamps (Plus Long-Video Method) - TicNote
- YouTube Video Summarizer — Summarize Any YouTube Video with AI Free | TranscriptMagic
- Summarize a YouTube Video with AI (2026): Step-by-Step - VOCAP